
Homemade Granola.bar

A homemade granola.bar is an easy, portable snack made from oats, a sticky binder, and simple mix-ins. The key to success is pressing it firmly and letting it cool or set completely before slicing.
A homemade granola.bar is a simple snack bar made from oats, a sticky binder, and mix-ins like nuts, seeds, or dried fruit. It works well for busy mornings, lunchboxes, and travel because you can shape the texture and sweetness to match your pantry and your preferences.
- Structure matters: Oats need a sticky binder and firm pressing to stay in bar form.
- Texture is adjustable: More binder and less drying time usually mean chewier bars.
- Storage counts: Airtight containers help bars stay fresh in humid kitchens.
- Safety matters: Check labels for allergens and discard bars with spoilage signs.
What a Homemade Granola Bar Is and Why It Works
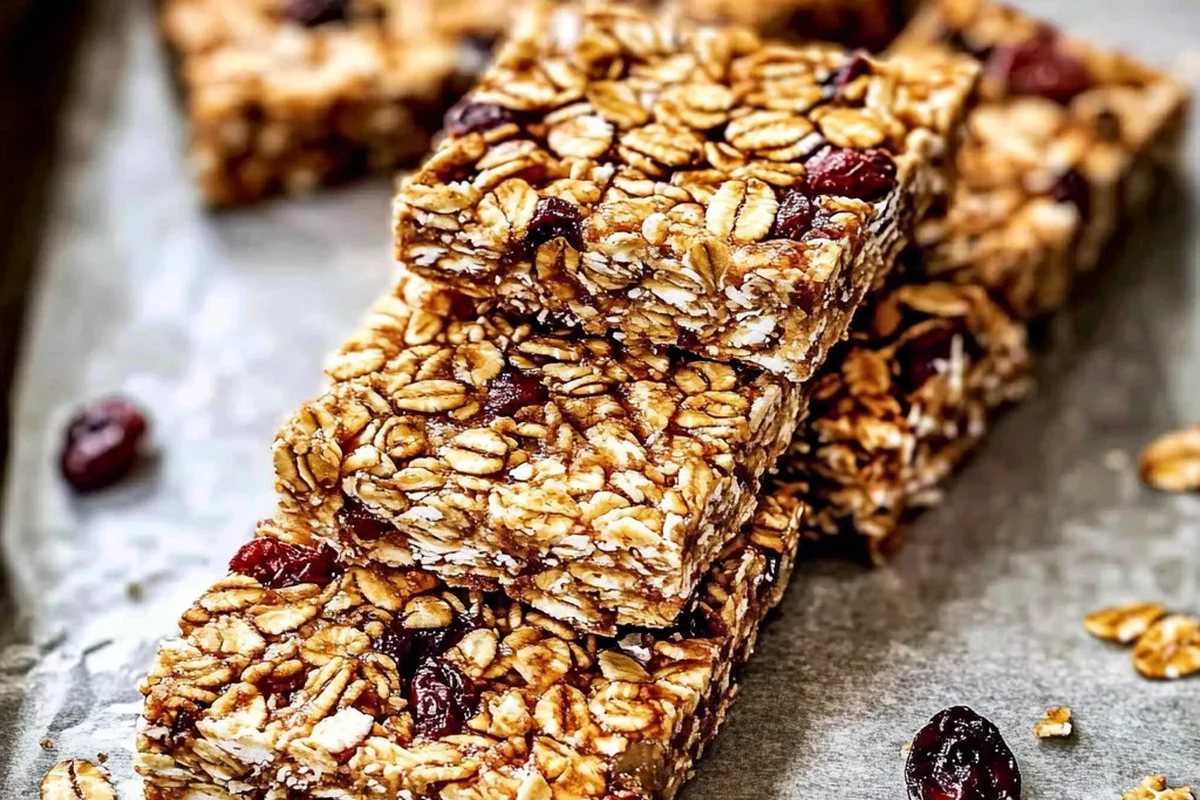
At its core, a homemade granola.bar is a pressed mixture of dry ingredients held together by something sticky enough to bind but not so wet that the bars turn soft. That balance is why some versions are chewy and slice cleanly while others crumble the moment you lift them from the pan.
Quick answer: the easiest way to make a homemade granola.bar that is chewy, portable, and budget-friendly
The easiest version usually starts with oats, a binder such as honey, maple syrup, or nut butter, and a little fat to help the bars set with a tender bite. Press the mixture firmly into a lined pan, chill or bake it depending on the recipe style, and let it cool completely before cutting.
How this BelizeanRecipe version fits snacks, school lunches, and on-the-go eating
For Belizean kitchens, the appeal is flexibility. You can use ingredients you already keep on hand, adjust the sweetness for children or adults, and pack the bars for school, work, beach days, or road trips without needing special equipment.
This article focuses on practical snack-making: simple ingredients, reliable structure, and storage tips that help homemade bars stay useful beyond the first day.
Ingredients That Make a Homemade Granola Bar Hold Together
The ingredient list matters more than the method for structure. If the mix is too dry, the bars fall apart; if it is too wet, they can become sticky, dense, or overly soft.
Base ingredients: oats, binder, fat, sweetener, and mix-ins
Most homemade bars need five building blocks: oats for bulk, a binder for sticking, a fat for richness and texture, a sweetener for flavor and cohesion, and mix-ins for taste. Rolled oats are commonly preferred because they keep more texture than instant oats, though the best choice depends on the style you want.
Best ingredient choices for texture, flavor, and nutrition
For a chewier bar, use a sticky binder like honey, brown rice syrup, or a thick nut butter. For more crunch, add toasted seeds or chopped nuts, but keep in mind that very dry add-ins can make the bars harder to hold together unless the binder is increased slightly.
If you want cleaner slices, keep the mix-ins small and evenly sized. Large chunks can create weak spots that make the bars break apart when cut.
For flavor, many home cooks like peanut butter, coconut, vanilla, cinnamon, or dried tropical fruit. If you enjoy snack-style treats with a dessert feel, you may also want to look at Boba Bar And Desserts for inspiration on sweet, casual serving ideas that pair well with a homemade snack plate.
Simple substitutions for Belizean kitchens and pantry swaps
Ingredient swaps are one reason these bars are so practical. If you do not have maple syrup, honey or corn syrup may work depending on the recipe style; if you do not have nuts, seeds can add crunch; if you do not use dairy, coconut oil is a common fat choice.
Exact substitutions vary by recipe and pantry item. Some swaps change sweetness, firmness, or shelf life, so it helps to keep the binder-to-oat ratio similar when possible.
How to Make Homemade Granola.bar Step by Step
The process is straightforward, but the order matters. Even mixing and firm pressing are what usually separate bars that slice neatly from bars that break into clusters.
Mixing the dry and wet ingredients evenly
Start by combining the dry ingredients in one bowl so the oats, seeds, spices, and salt are distributed well. In a separate bowl or saucepan, combine the binder and sweetener if the recipe calls for warming them, then stir the wet mixture into the dry until every oat looks lightly coated.
Mix oats, nuts, seeds, salt, and any dry spices so the flavor is even throughout the batch.
Stir in honey, nut butter, syrup, or another binder until the mixture looks evenly moistened.
Add dried fruit or chocolate chips after the mixture cools slightly so they do not melt or harden unevenly.
Pressing the mixture firmly for clean slices
Once the mixture is in a lined pan, press it down firmly and evenly. A flat-bottomed cup, spatula, or clean hand can help compact the surface so the bars set into one solid sheet instead of a loose crumble.
Baking or no-bake setting methods and when to use each
Baked bars usually taste toastier and can hold a firmer structure, especially when oats and nuts are lightly warmed. No-bake bars are convenient when you want a softer chew and less kitchen heat, but they often need more chilling time and a stronger binder to slice neatly.
If you prefer a crisp snack base rather than a chewy bar, a recipe like Homemade Triscuit Cracker Recipe can be a useful comparison because it shows how dry, crunchy snacks depend on a very different moisture balance.
Key Techniques That Improve Texture and Structure
Texture comes from managing moisture, fat, and compression. Small adjustments can make the difference between a bar that bends slightly and one that snaps or crumbles.
How to get chewy bars instead of crumbly bars
Chewy bars usually need enough sticky binder to coat the oats and enough resting time to let the mixture settle. Slightly underbaking baked bars can also help preserve chew, while overbaking tends to dry them out and make them brittle.
How to balance sweetness, crunch, and moisture
Sweeteners do more than add flavor; they also help the bars stick together. Crunchy add-ins improve texture, but too many dry ingredients can absorb the binder and make the bars less cohesive, so the best approach is usually a modest amount of mix-ins rather than an overloaded pan.
- Use rolled oats for better texture unless your recipe specifically calls for quick oats.
- Let baked bars cool fully before cutting so the structure can set.
- Store bars with parchment between layers to reduce sticking.
- Taste the mixture before pressing if all ingredients are safe to sample and the binder is already mixed.
Common mistakes that cause bars to fall apart or turn too hard
The most common mistake is not pressing the mixture tightly enough. Other problems include too little binder, too many dry add-ins, cutting the bars before they have cooled, or baking them too long until the edges become hard and the center dries out.
- Measure ingredients consistently within the recipe style.
- Press the mixture into an even layer.
- Cool or chill completely before slicing.
- Adding extra oats without increasing the binder.
- Cutting warm bars that have not set.
- Overbaking until the bars become dry and brittle.
Food Safety, Doneness, and Handling
Granola bars are simple, but they still deserve basic food safety care, especially when they contain nuts, dairy, seeds, or fresh add-ins. For official guidance on storage and cross-contamination, readers should check USDA or FDA food-safety resources and follow any package instructions for ingredient-specific handling.
Safe handling for sticky binders, nuts, seeds, and add-ins
Wash hands, keep prep surfaces clean, and avoid cross-contact if anyone in the household has nut or gluten allergies. If you use ingredients like peanut butter, almond butter, or mixed seeds, confirm labels carefully because manufacturing practices vary by brand and region.
Do not serve bars that contain raw egg, raw flour, or other ingredients that require cooking unless the recipe is specifically designed and handled safely. When in doubt, follow recognized food-safety guidance and ingredient label directions.
Doneness cues for baked bars and set-time cues for no-bake bars
Baked bars are usually ready when the edges look set and the center no longer appears wet, though exact timing varies by pan size, oven behavior, and ingredient choices. No-bake bars should feel firm after chilling, not soft in the middle or greasy on the surface.
When to discard bars that smell off, feel damp, or show spoilage
Throw away bars that smell sour, moldy, or stale in an unusual way, or that develop visible spoilage, dampness, or odd texture changes. If a bar was left out too long in warm conditions or made with perishable ingredients, it is safer to discard it than to guess.
Discard food that shows spoilage signs and follow safe storage-time guidance from recognized food-safety authorities, especially when bars contain dairy, fresh fruit, or nut butters.
Storage, Shelf Life, and Reheating or Serving
Storage depends on the ingredients and the climate. In warm, humid kitchens, airtight storage matters even more because moisture can soften the bars and shorten their useful life.
Best containers for countertop, fridge, and freezer storage
An airtight container is the best all-around choice for keeping bars from drying out or absorbing odors. If the bars contain ingredients that benefit from chilling, the fridge can help them stay firmer, while the freezer is useful for longer storage when wrapped well and separated with parchment.
How long homemade granola bars usually keep in real kitchen conditions
There is no single shelf-life number that fits every recipe because storage time depends on moisture, binder type, and room temperature. Bars with dry ingredients and strong binders usually last longer than bars with fresh fruit or softer add-ins, so always check for smell, texture, and visible spoilage before eating.
Serving ideas for breakfast, lunchboxes, travel, and post-work snacks
Homemade bars are easy to pack with fruit, yogurt, or a hot drink for breakfast. They also work well in lunchboxes, on road trips, after errands, or as a quick snack between meals when you need something portable and not too messy.
If you are packing bars for school or travel, wrap them individually so they stay cleaner and are easier to grab. This also helps prevent the whole batch from drying out after repeated opening.
Value, Variations, and When Homemade Beats Store-Bought
Homemade bars often win on freshness and customization, but they are not always the easiest option for every household. The best choice depends on how much time you have, how picky your eaters are, and whether you want a snack that is more budget-conscious or more shelf-stable.
Cost, freshness, and customization advantages
When you make bars at home, you can use pantry ingredients, control the sweetness, and choose the texture you like. That makes homemade versions especially appealing for families who want fewer packaged snacks and for cooks who prefer to stretch ingredients across several days of meals.
Limitations: when store-bought bars may be more practical
Store-bought bars can be more practical when you need very long shelf life, strict portion consistency, or a snack that travels through heat better than a homemade batch. They may also be the easier choice when you do not have time to cool, cut, and store a homemade batch properly.
- Flexible ingredients and flavor choices
- Fresh from your kitchen
- Easy to adapt for family preferences
- Can crumble if the binder balance is off
- Usually shorter shelf life than packaged bars
- Requires cooling or setting time
Flavor variations: tropical fruit, chocolate, peanut, and seed-based options
For a Belize-inspired pantry feel, tropical fruit versions with dried mango, pineapple, or coconut can bring bright flavor. Chocolate-peanut bars are popular for a dessert-like snack, while seed-based bars can be a good fit for people who want more crunch and less sweetness.
Tropical fruit granola bars
Good for readers who want a bright, island-style snack with dried fruit and coconut. The main limitation is that fruit-heavy bars may soften faster in humid storage conditions.
Peanut or seed-based bars
Better for cooks who want a firmer bite and stronger structure. These are useful when you need a more filling snack, but they may not suit nut-free households.
Final Recommendation for BelizeanRecipe Readers
If you want a practical snack that fits school lunches, road trips, and weekday routines, homemade granola.bar is a smart place to start. The easiest version for most beginners is a chewy oat bar with a sticky binder, a little fat, and only a few mix-ins so the structure stays reliable.
Who should make homemade granola.bar and what version to start with
This is a good project for beginner cooks, busy parents, and meal preppers who want a flexible snack without complicated steps. Start with a basic baked oat bar if you want firmer slices, or choose a no-bake version if you prefer convenience and a softer texture.
Best next step: choose your texture goal, pick your binder, and batch once a week
The simplest way to succeed is to decide whether you want chewy, crunchy, or soft bars before you begin. Once you choose your binder and texture goal, making one batch a week can keep snack planning easier and reduce the need for last-minute packaged options.
- Use oats, a sticky binder, and firm pressing for bars that hold together.
- Chewy bars usually need enough moisture and full cooling before slicing.
- Store in airtight containers and check for spoilage before eating.
Common Questions
It is a snack bar made from oats and a binder, usually with nuts, seeds, or dried fruit. It is designed to be portable and easy to store.
Mix the ingredients evenly, press them firmly into a lined pan, and let them cool or set completely. That gives the bars the best chance of holding together.
They may not have enough binder or may not have been pressed firmly enough. Cutting them too soon can also cause breakage.
Yes, many recipes use chilling instead of baking. No-bake bars usually need a stronger binder and more set time.
It depends on the ingredients and storage conditions. Check for smell, texture changes, and spoilage before eating.
Frequently Asked Questions
Oats, a sticky binder, and a little fat are the main structure builders. Mix-ins like nuts, seeds, and dried fruit add flavor, but too many can make the bars harder to hold together.
Yes, but different binders change the final texture. Honey, syrup, and nut butter all behave differently, so keep the mixture balanced and adjust carefully.
The edges should look set and the center should no longer look wet. Exact timing varies by oven and pan size, so visual cues are more reliable than a fixed number alone.
They may have been baked too long or packed with too little moisture. Overheating the binder can also make the final texture firmer than expected.
Use an airtight container and keep them away from heat and moisture. If the recipe contains perishable ingredients, follow safe refrigeration guidance and discard anything that smells off or looks spoiled.
Check for nuts, seeds, dairy, gluten, and any cross-contact risks from packaged ingredients. If someone has a serious allergy, read labels carefully and follow recognized food-safety guidance.


