Grill Chicken in Oven

To grill chicken in your oven, bake it until nearly cooked through, then finish it under the broiler to achieve a crispy, charred exterior. Always use a wire rack to ensure even heat circulation and monitor the internal temperature to hit the safe 165°F mark.
You can achieve the smoky, charred exterior of outdoor-cooked poultry right in your kitchen by mastering the broiler and convection settings. This guide explains how to adapt traditional techniques to your home oven for a perfect, restaurant-quality result.
- Temperature Control: Use a meat thermometer to confirm an internal temperature of 165°F (74°C).
- Airflow: A wire rack is essential to prevent steaming and ensure a crispy skin.
- Preparation: Pat chicken completely dry before seasoning to encourage proper browning.
- Technique: Combine baking for internal doneness and broiling for that final charred finish.
The Ultimate Guide to Achieving Authentic Grilled Flavor in Your Oven
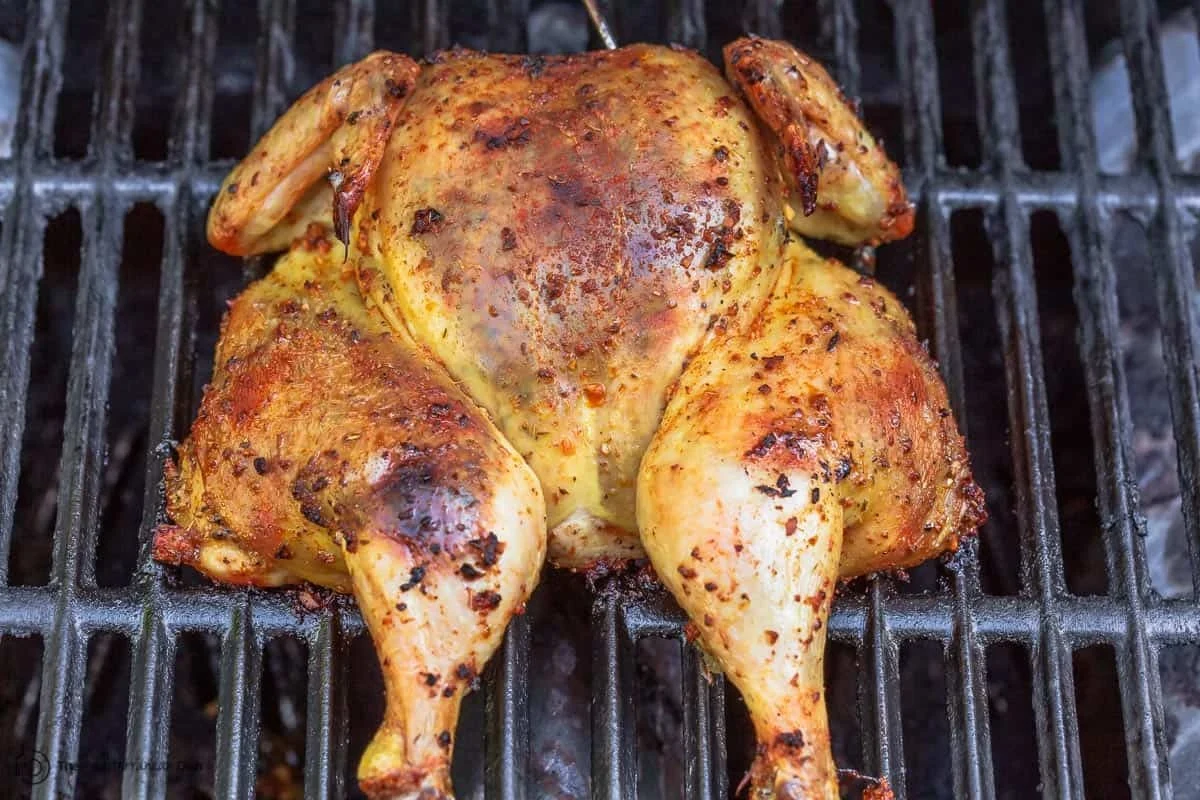
Many home cooks assume that a backyard grill is the only way to achieve that signature charred crust on chicken. However, with the right approach, your kitchen appliance can mimic these results effectively. Whether you are using a standard gas or electric oven, the goal is to balance high-heat searing with controlled internal cooking.
What Is Oven-Grilled Chicken and Why It’s a Game Changer

Oven-grilled chicken is essentially a hybrid cooking method that utilizes the intense, direct heat of the broiler to simulate charring, followed by steady baking to ensure the meat is cooked through. It is a game changer for those who want that bold, smoky profile year-round, regardless of weather conditions or outdoor space constraints.
The Science of Achieving Char Without a Backyard Grill
Charring is the result of the Maillard reaction—a chemical reaction between amino acids and reducing sugars that occurs at high temperatures. In an outdoor grill, direct flames create this crust. In an oven, we replicate this by positioning the chicken close to the heating element (the broiler) during the final stages of cooking, which caramelizes the sugars in your marinade and creates the desired texture.
Who This Cooking Method Fits Best
This method is ideal for urban dwellers, busy parents looking for efficient dinner solutions, and anyone who wants to replicate the flavors found in a traditional Belizean BBQ chicken recipe without the need for charcoal or propane tanks. It is also perfect for those who prefer consistent, predictable heat rather than the fluctuating temperatures of an outdoor pit.
Essential Ingredients for Belizean-Style Oven-Grilled Chicken
To get the most flavor, focus on a robust marinade. A traditional style often includes ingredients like lime juice, recado (annatto paste), garlic, and a touch of vinegar. The acidity helps tenderize the meat, while the spices provide the deep, earthy color and flavor characteristic of Caribbean cuisine.
Always pat your chicken skin dry with paper towels before seasoning. Excess moisture creates steam, which prevents the chicken from browning effectively.
Selecting the Right Cuts: Bone-In vs. Boneless
Bone-in cuts, such as thighs and drumsticks, are more forgiving and retain moisture better during the high-heat broiling process. Boneless breasts can work, but they require careful monitoring to prevent them from drying out. If you prefer the ease of modern equipment, you might also explore specialized methods like air fryer chicken thighs for smaller batches.
The Marinade: Balancing Acid, Spice, and Aromatics
A great marinade needs three components: acid (citrus or vinegar) to break down fibers, fat (oil) to conduct heat, and aromatics (garlic, onion, herbs) to build flavor. Allow the chicken to marinate for at least four hours, but preferably overnight, to ensure the flavors penetrate the meat.
Mastering the Technique: Step-by-Step Oven Grilling
Combine your spices and liquids, then submerge the chicken. Keep it refrigerated while marinating to maintain food safety.
Set your oven to 400°F (200°C) for the initial bake. Ensure your oven racks are positioned correctly.
Place chicken on a wire rack set over a baking sheet. Bake until the internal temperature reaches approximately 155°F (68°C).
Switch to the broiler setting. Move the rack to the top position and broil for 3–5 minutes per side, watching closely to prevent burning, until a charred crust forms.
Using the Right Equipment: Racks, Pans, and Foil
A wire rack is essential because it allows hot air to circulate around the entire piece of chicken, preventing the bottom from becoming soggy. Place a foil-lined baking sheet underneath the rack to catch drippings, which makes cleanup significantly easier.
Common Mistakes That Ruin Oven-Grilled Chicken
- Use a meat thermometer to ensure accuracy.
- Pat the skin dry before applying any oils or rubs.
- Use a wire rack to promote air circulation.
- Crowding the pan, which leads to steaming.
- Using sugary glazes too early, as they will burn under the broiler.
- Opening the oven door repeatedly, which drops the temperature.
Food Safety and Doneness Cues
According to the USDA, poultry must reach a safe minimum internal temperature of 165°F (74°C) to destroy harmful bacteria. Always insert a food thermometer into the thickest part of the meat without touching the bone.
Storage, Reheating, and Maximizing Leftovers
Store cooked chicken in an airtight container in the refrigerator for up to 3–4 days. To reheat without drying it out, place it back in the oven at 350°F (175°C) with a splash of water or broth in the pan, covering it with foil until warmed through.
Substitution Guide: Adapting the Recipe to Your Pantry
If you lack a wire rack, you can use a perforated roasting pan or even elevate the chicken on a bed of thick-cut onions and peppers. If you are out of a specific spice, smoked paprika is an excellent substitute for adding that “grilled” flavor profile to your marinade.
Final Verdict: Is Oven-Grilling the Best Way to Enjoy Chicken?
Oven-grilling is an exceptional technique for home cooks who want convenience without sacrificing the charred, flavorful crust of traditional BBQ. While it requires attentive monitoring during the broiling phase, it produces consistent results that are safer and more manageable than outdoor grilling in 2026. If you have the patience to manage the broiler, it is arguably the most reliable way to achieve restaurant-style chicken in a residential kitchen.
Common Questions
Yes, flipping ensures even browning on both sides, especially when using the broiler.
You can use a perforated pan or place the chicken on a bed of thick-cut vegetables to elevate it.
Apply BBQ sauce only during the last 2-3 minutes of broiling to prevent the sugars in the sauce from burning.
Standard electric and gas ovens work well, though convection settings may cook the chicken slightly faster.
Avoid overcooking by checking the temperature frequently and using bone-in cuts which stay succulent longer.
Frequently Asked Questions
Yes, you can mimic a smoky flavor by using ingredients like smoked paprika, chipotle powder, or a drop of liquid smoke in your marinade. These additions provide the depth of flavor typically associated with wood-fired cooking.
Soggy chicken is usually caused by excess moisture or overcrowding the pan. Always pat the chicken dry before cooking and ensure there is enough space on the rack for air to circulate freely around each piece.
For the best results, marinate for at least 4 hours. If you have the time, marinating overnight in the refrigerator allows the flavors to penetrate deep into the meat and helps tenderize tougher cuts.
Yes, broiling is a safe and effective way to cook chicken. However, because it uses high, direct heat, you must watch the chicken closely to prevent the exterior from burning before the inside is fully cooked.
The USDA recommends an internal temperature of 165°F (74°C) for all poultry. Use a meat thermometer to check the thickest part of the meat to ensure it is fully cooked and safe to eat.
Yes, but they cook much faster than bone-in pieces. Reduce your baking time and monitor them carefully during the broiling step to avoid drying them out, as breasts have less fat than thighs.